I sometimes enjoy listening to radio stations through my Google Nest speaker, but it does not recognize most local channels and it’s always a bit of a hassle to find the correct app or website that can be used to cast the channels to Nest. So why not use Home Assistant to do that?
I tried different configurations and add-ons, and finally settled on this method by Smart Home Junkie, as it requires very little configuration but achieves exactly what I was looking for. Some steps in the video are a bit outdated, but everything was easily applicable today. For detailed steps, you can follow the video, but here is a short summary of the instructions.
These are the resources required:
– A device configured in HA which can be used to play media. This guide assumes you already have one installed.
– Mini Media Player (HACS add-on).
– Radio Browser (HA add-on, not to be confused with the website).
– Radio station IDs.
1. Install Mini Media Player
Mini Media Player can be installed through HACS (in Frontend repositories). It’s a highly customizable media player that can be used to play preconfigured radio stations, Spotify playlists and other media files. You can find customization instructions on the Github repository.
2. Install the Radio Browser
Radio Browser should be installed in you HA system by default, but if not, it can be added in Settings > Devices & services > Add integration.
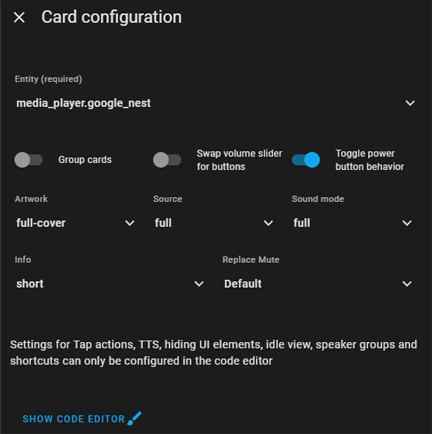
3. Add Mini Media Player to your dashboard
This can be done by editing the dashboard and adding the Mini Media Player card. It has settings for e.g. title, icon and song artwork (applicable mainly with Spotify). The most important one is the Entity setting, where you should select the device you are using to play media. In my case, the entity is media_player.google_nest.
4. Add the radio stations
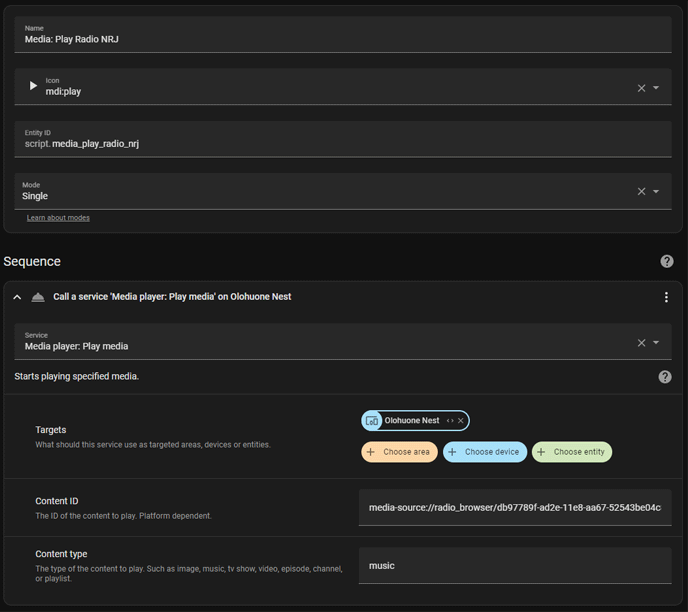
To add the radio stations we need to create a script for each station with the correct ID pointing to the station stream. For IDs, we are using the RadioBrowser website. First, search for the station you want to add, click on the detail page, and find the ID on the URL of the browser window (you can find detailed instructions in the video). For example, the ID for radio NRJ is ‘db97789f-ad2e-11e8-aa67-52543be04c81’.
To create scripts, in HA go to Settings > Automations & Scenes > Scripts > Add script. Fill in the name and icon, and add a ‘Call service‘ action. In the Service field, select ‘media_player.play_media‘. For the target, select the correct device, and in Content ID, input ‘media-source://radio_browser/yourstationID‘, where yourstationID is the ID you looked up from the RadioBrowser website. Content type should be ‘music‘. Finish by clicking Save script.
You need to create a script for every radio station you want to include in the player.
5. Call the scripts from the Mini Media Player
Edit the Mini Media Player card on your dashboard with Show code editor. Add the following code after the predefined lines:
shortcuts:
  columns: 3
  buttons:
    - type: script
      name: Radio NRJ
      id: script.media_play_radio_nrj
Click Save, and now you should have a button that plays the radio channel on you selected device. To add more stations, just add more scripts and corresponding buttons like we did here. The Smart Home Junkie instruction video also shows how you can add channel logos to the buttons instead of the names.
You can configure the Mini Media Player to control different sources, speaker groups and even Spotify. I’m currently trying out the Spotify integration (with Spotcast), perhaps I’ll post on article on it if I manage to get it running.